 This guide is intended to help Mac users waste time by installing Kyocera print drivers manually. An easier and faster option is to use the Kyocera Auto Installer but if you insist see below.
Again the Kyocera Auto Installer performs each step automatically with one click.
Step 1. Download OEM Print Drivers
Go to https://usa.kyoceradocumentsolutions.com/en/download-center.html enter your Model Number and click on Technical Downloads.

Click on Drivers.

Download the latest KX Print Driver.

Step 2. Extract the Print Drivers
- Go to your Downloads folder, open the exectuable file, copy the Unzip it to folder PATH (You'll need this next) and click Unzip .

Step 3. Install Print Drivers & Create Print Queue
Go to your Control Panel and click on Devices and Printers.

Click on Add Printer.

Select The printer and want isn't listed.

Select Add a printer using a TCP/IP address or hostname and hit Next.

Select Device type: TCP/IP Device enter the Hostname or IP address and uncheck Query the printer and automatically select the driver to use and hit Next.

Select Have Disk and hit Next.

Past file path from when you ran the exectuable to extract the print drivers and click OK.

Select Disk 1 select oemsetup.inf and click Next.

Select the konica PCL6 UniviersalDriver V4.29 and click Next .

Enter a desired Printer Name and click Next .

It takes about 5 minutes for an above average user to install 1 print driver. Save yourself some time and just use the Konica Auto Installer.
Troubleshooting
Whats my IP Address?
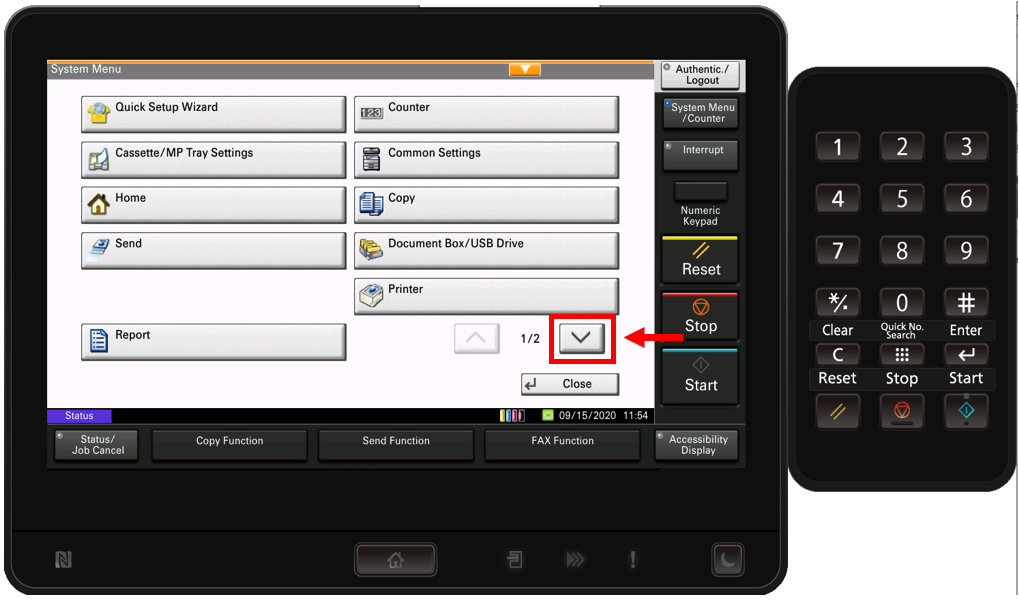
Go to the Home Screen and click on System Menu.

Click on the Down Arrow.
Click on System/Network.

Enter the admin Username and Password. The default credentials are Admin/Admin or the first 2 digits of the model number and then 00. Example, for the Kyocera TASKalfa 4550ci would be username: 4500 password: 4500.

Click on Network.

Click on Wired Network Settings.

Click on TCP/IP Setting.

Click on IPv4.


Change default print settings
Go to your Control Panel and click on Devices and Printers.
Right click on the printer and select Printer Properties.

Select the Advanced tab and select Printing Defaults.

Make your changes and click Ok.
